
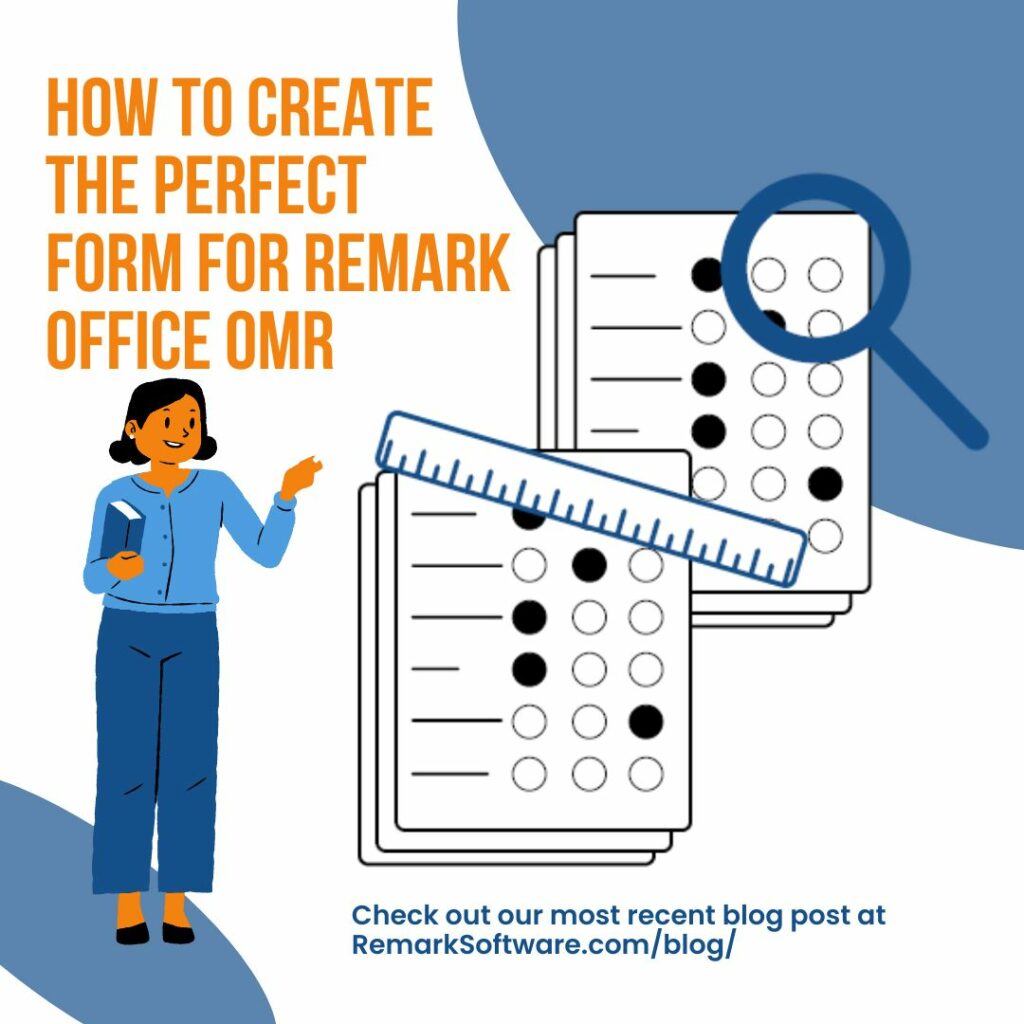
Remark Office OMR has helped its users scan and collect data from billions of original forms in its 30+ years. With award-winning OMR technology and versatile data collection abilities, it is no wonder that Remark and its products are loved by customers all around the world. Leveraging its flexibility, you create your forms with any word processor or design tool and use your existing office equipment to scan these forms.
You may be asking yourself, “How do I design my forms for scanning with Remark Office OMR?” Follow these 10 steps on how to make the perfect form, and you will be well on your way to creating your own forms in no time!
1. Select a font for OMR areas on your form.
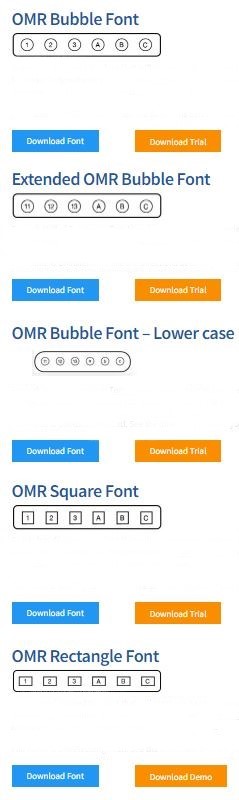
We recommend you use one of our OMR fonts on your forms when possible. Gravic’s OMR fonts come in different styles including bubbles, rectangles, and squares. The fonts represent each of your answer choices in the desired shape with a letter or number printed inside. The fonts are specially designed for use with Remark Office OMR and are true-type fonts that can be used in almost any Windows design application or word processor. If you do not want a letter or number inside your bubbles you can create an empty bubble by selecting the (`) key (the key to the left of the “1” on the U.S. Standard keyboard). These fonts install automatically with the Remark Office OMR software or can be downloaded here.
2. Create proper spacing in your form.
A critical consideration when designing a form is allowing proper spacing around and between your marks (bubbles). A good rule of thumb is to allow at least 3/8 inch between any text, lines, or graphics on the form and any bubble areas, OCR/ICR text, or barcodes. Minimize potential errors by separating your bubbles from one another by at least two-character spaces.
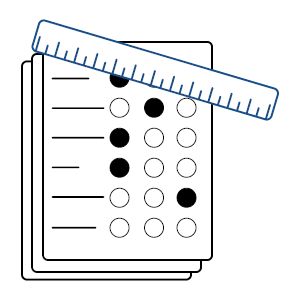
3. Place similar items in groups
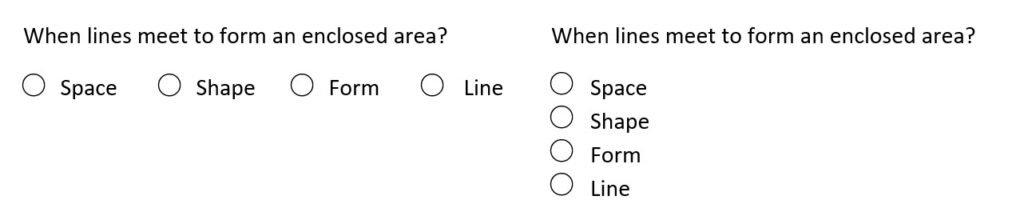
When creating a form for scanning with Remark Office OMR there are two things to consider. The first is to make the form as scannable as possible. Second, make the job of setting up a Remark template as easy as possible for yourself. A well-designed form takes both of these items into consideration. Remark Office OMR works best when you have more bubbles in a region. Being able to set up one region in your template to encompass all the bubbles of that region is always a good practice. Below are two ways to represent the same question. On the left, we have bubbles with the labels between each option. This is not a good way to represent this question in a scannable form. It will work to some degree, but you are more likely to experience recognition issues on poorly scanned forms. On the right, the same question is displayed where the marks are in a column to the left of the text. This is easier to set up in the template and is less likely to be affected by poorly scanned forms.
4. Explore commonly used form elements.
We created some common form elements for you to download and use in your forms, including Numeric ID bubble fields (3, 4, 5, and 6 digits), bubble-in name grid, month-to-minute timecard, and several images showing how to properly fill in bubbles. These elements are provided to save you time from having to design them yourself.
Explore the common form elements.
5. Utilize barcodes.
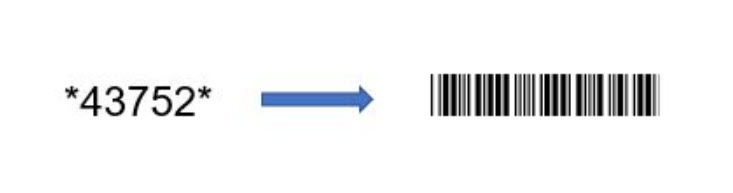
Barcodes are great for capturing static information. Barcodes should be at least 26 points in height. A free barcode font, Code 3 of 9, installs with the Remark software and can also be downloaded here. When using this font in a word processor you type the text you want to represent in the barcode in a human-readable font. Then you select the text and change the font to the 3 of 9 Barcode font. When using the 3 of 9 Barcode font the data in the barcode must start and end with an asterisk (*) character as in the example below.
Similar to OMR bubbles, leave at least 3/8 inch of space around your barcode. Do not bold or italicize barcodes. Remember that barcodes may vary in length depending on what you are capturing. Leave room for the largest expected barcode both on the form and when you create your region definition in your Remark template.
6. Use OCR to capture preprinted text.
If you plan to use our OCR (Optical Character Recognition) feature to read preprinted text on a form, use a larger font size, such as 14 or larger. When selecting a font, use a common font such as Arial or Times New Roman. Stay away from handwriting-style fonts, which are harder to interpret. If you notice letters that almost touch each other due to their shape, use your word processor’s character spacing feature (sometimes called kerning) to put more space between the letters. Do not bold or italicize OCR text. When it comes time to scan forms that use OCR, use a scanner resolution of 300 DPI (dots per inch).
7. Stick with black ink and the rules of lines and shading.
Remark Office OMR works best with bubbles printed in black ink without shading or lines of any kind in your OMR data areas. If you feel you have to use shading to guide the user’s eye to the row of bubbles, you can use a light gray color shading. You will need to thoroughly test this with your scanner to make sure when you scan the forms, the shading completely drops out (a 5-10% gray typically works best). Note that you cannot photocopy forms that use shading as the shading will add speckles to the image that can interfere with the recognition.
Similarly, if you have to use lines, make sure they are far enough from any OMR bubbles so you can set up the template correctly and not have the line interfere with recognition. If pages are scanned with any skew, lines will often be problematic. If you have to use a line, print the line in a light gray color so it will drop out when scanned.
8. Take advantage of the free form review service.

Think you are finished designing your form? Not so fast! We strongly recommend you have a Remark Expert review your form before you print and distribute it! We offer a FREE service to all Remark customers and those using trial versions. A Remark Expert will take a look at your form and provide feedback on your design. It is FREE and painless, and will potentially save you a lot of work down the road. Click the link to learn more about this FREE service.
9. Test your form.
Always test any forms you plan to use with Remark Office OMR before printing and distributing them. Fill out several copies just like your respondents will… not perfectly! Then scan them to ensure you have a good form design and have set up your Remark template correctly.
10. Keep it consistent.
You can photocopy forms. The accuracy of page placement into the photocopier when copying forms and into the scanner when reading forms are the limiting factors as to how large your margins must be to minimize errors. Forms with inadequate spacing will have a low tolerance for offset/skew. Test your form before printing large quantities.
Try to photocopy as many forms as you need upfront so that you do not end up having to do your copying in different batches at different times. The alignment of the copier and the amount of toner will be more consistent if copied at the same time. Variability in these items can cause issues with recognition. Print some extra forms and keep some unfilled forms on hand from your original batch. This way if you run out or if some get spoiled, you will always have a few extras.
Note: If making photocopies, create your template on the photocopied version rather than the original.
Hopefully, these ten tips help you when creating your next custom form for use with Remark Office OMR.
If you aren’t already a customer and are interested in learning about how you can create original forms using Remark Office OMR you can sign up for a free demonstration or a free trial to see what Remark Office OMR is all about. You can also contact the Remark Sales Team at [email protected] or 1-800-858-0860 to discuss your needs.
Share This
What Now?